Description
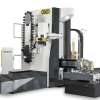
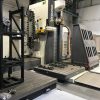
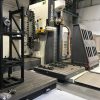
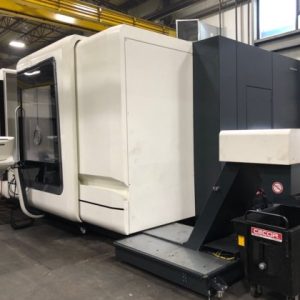
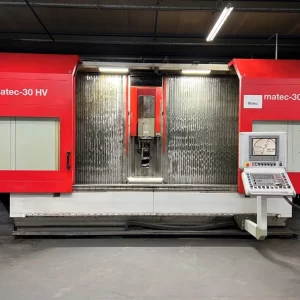
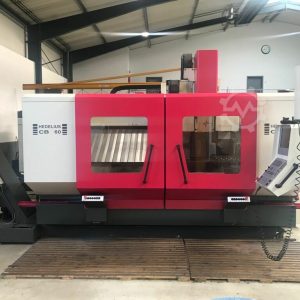
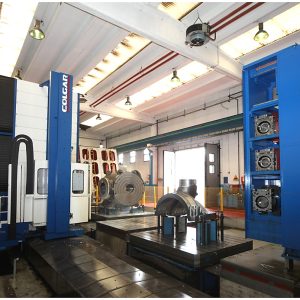
FPT Industrie VERUS 250 – Year 2019
CNC Travelling Column Horizontal Milling 6 Meters
Manufacturer: FPT Industrie
Model: VERUS 250
Year of construction: 2019
Condition: like new (used)
Functionality: fully functional
Operating hours: 850 h
Travel distance X-axis: 6,000 mm
Travel distance Y-axis: 1,500 mm
Travel distance Z-axis: 2,500 mm
Equipment: documentation/manual
CNC Mobile column milling machine in perfect working condition (like new).
FPT Industrie VERUS 250 CNC Travelling Column Horizontal Milling – Year 2019 PDF Document
Base machine components
CARTEC_VM Technical Specifications
Max. feed rate of interpolating axes m/min 35
Max. power installed kVA 75
Max. current requested A 100
Air flow required for the pneumatic system Nl/min 400
Working pressure of the pneumatic system bar 6
PF2040T15 Cast-iron floor plate mm 2000×4000, mm 300 high, maximum
load bearing capacity 15t/m^2
T slots mm 28 DIN 650 (H12) distance between centers 250 mm, complete with levelling units.
VM_L60 Longitudinal axis
Stroke mm 6000
VM_T15 Cross axis
Stroke mm 1500
VM_V25 Vertical axis
Stroke mm 2500
VRM0534 Spindle motor for mechanical heads
“Direct type transmission” spindle motorisation. The motor is with continuous speed variation, designed and
developed by FPT. This configuration allows an extremely reduced backlash and elasticity, therefore a better
chips removal, a limited wear-out of tools and lower noise level during milling applications. The whole spindle
motor system is developed in order to ensure high reliability level and very low maintenance compared with
conventional systems.
Max. power kW 34
Torque usable on spindle Nm 830
Continuous running at constant power r.p.m. 450 – 5000
Max. spindle revolutions r.p.m. 5000
Spindle motor rotation range r.p.m. 52-5000
HE-640-19 CNC Heidenhain TNC640 – 19″
Components:
– main computer MC
– controller unit CC
– keyboard TE
– 19″ TFT Colour flat panel display
Memory:
– RAM: 4 GByte
– 32 Gbyte Hard disk with min 21 Gbyte program memory
Input resolution and display step:
– Linear axes up to 0,1 µm
– Angular axes up to 0,0001°
Input range:
– max +/- 99999,9999 mm (+/- 3937 in.) or +/- 99999,9999°
Interpolation:
– Circular interpolation in 3 axes with rotated working plane
– Helical interpolation: superimposition of circular and linear path
– Linear in 5 axis (version subject to export license)
Block processing time:
– 0,5 ms (3D straight line without radius compensation)
Axis feedback control
Position loop resolution: signal period of the position encoder/1024
– cycle time of position controller: 200 µs
– cycle time of speed controller: 200 µs
– current controller cycle time: min. 100 µs
Data interfaces:
– 1 x RS-232-C
– 2 x Ethernet 1000BaseT (Twisted Pair Ethernet)
– 1 x frontal USB 2.0
– 4 x rear USB 3.0
PR-HR510 Remote handwheel HR510 for HEIDENHAIN CNC
-Selection of axes via keys or softkeys
– Keys for axis continuous movement
– Emergency stop button
– Fixing by magnet
– Dead man keys (CE norms)
FTCSA Semiautomatic accessory change
Device permitting the semiautomatic head change, including automatic connections (such as hydraulic, electronic
and measuring systems) between ram and head. Manually clamping of the heads to the ram.
Page 10 / 23- Offer 354-19/3 – 476//AS –
DIP INTERNATIONAL SRL
TUPCAG0537_BT50 Universal head with one thousandth of degree positioning
resolution
Automatic universal bi-rotative head. The head is equipped with a special system which allows both axes to be
positioned with a resolution of one thousandth of degree. Rotation of head axes is controlled and managed by
the CNC. Head structure is in spheroidal cast iron. Head is provided with automatic tool clamping device, rigid
tapping and support which enables to unload the head from the ram.
Power usable on spindle kW 34
Tool holder type BT50
Head angle rotation A axis ° + 180
Head angle rotation B axis ° + 180
RTCP-SS Static RTCP software in the space
It allows the programming of machining in any direction of the head maintaining the origin point. Useful for moulds
production when machining with inclined spherical tool also in general mechanics for machining on the 5 faces
of the cube and inclined in any direction. This option is required for each head and for each electrospindle.
PD-SE Preparation of the machine for set up of the spindle
extension mod. SE4*, SE6*, SE9*
Preparation of the machine for the set up (also in the future, but not later than 3 years from machine delivery) of
spindle extension Mod. SE*. It includes pneumatic, hydraulic and electrical circuits.
SE4200545_BT50 Spindle extension ratio 1:1, D200 mm, L400 mm
Spindle extension with inside cooling system and tool clamping device. Automatic latching system of the tool,
provided with support which enables to unload the head from the ram.
Power usable on spindle kW 34
Torque usable on spindle Nm 830
Max. spindle revolutions r.p.m. 5000
Tool holder type BT50
2 x AMR-M 2 x Rigid tapping for mechanical heads
COE_2M Head common reference point for 2 heads
This option allows the maintenance of a common zero point with various milling heads when one head is
substituted with another. In this way the tool comes back always at the same zero (origin) of the head previously
changed. The common reference point is made with the spindle in horizontal position in order to facilitate the
common reference point between universal and horizontal heads.
Page 11 / 23- Offer 354-19/3 – 476//AS –
DIP INTERNATIONAL SRL
TC Double storage-cradles for loading/unloading of two milling
heads with software.
Modular two-position storage-cradle for housing of the milling heads. It must be set from time to time within the
machining area. It is supplied complete with management software to allow the changing of the milling heads.
PD_TA_TU* Preparation for the installation of orthogonal heads, TUPC/
TUPCAG/TU144 head
The preparation enables orthogonal heads to be installed on the main milling head. The preparation includes
antirotating block, which is installed onto milling head.
TA16PL Angular head
Automatic clamping of the head onto the spindle taper of the main milling head.
It is equipped with system for coolant outside the spindle. Tool manually changed.
Power usable on spindle kW 15
Torque usable on spindle Nm 45
Max. spindle revolutions rpm 3000
Max tool weight kg 15.5
Tool holder type DIN6388-ER32
RTCP-SP Static RTCP in the plane
Static RTCP software in the planes. It allows the programming of machining in the ninety degrees square angles
maintaining the origin point. Useful for moulds production and in general mechanics for machining on the 5 faces
of the cube.
SRV Sensor to detect vibration
It is a system which detects collisions and excessive vibrations on three axes and permits to reduce damages to
the machine.
The system has a reaction time of about 1 millisecond which enables to contain every kind of shock, minimizing,
therefore, any possible damage to the tools, to the workpiece and to the machine. The system is continuously
checked by the electronic interface, which is installed on the machine, to test its activation and correct
functionality.
Page 12 / 23- Offer 354-19/3 – 476//AS –
DIP INTERNATIONAL SRL
AUTOCAL AUTOCAL software for automatic calibration
The program automatically executes the measurement cycles and the relevant adjustment of the values indicated
in the kinematic lists on which the CN set the elaboration of the RTCP function. Once the program starts, the
operator is guided into the functions of checking and adjustment. AUTOCAL can be used in case of ordinary and
extraordinary maintenance influencing the accuracy of the RTCP function, for example:
– substitution of the electrospindle;
– minor collisions;
– head maintenance;
– updating of the head geometry.
MAPR is required.
MAPR Touch probe for workpiece measuring and alignment
Touch probe with radio wave transmission for measuring details on the machine. Measurement is taken through
automatic cycles and then sent directly to the CNC. Measurement cycles are already included in HEIDENHAIN’s
CNC.
MRLUL_01 Laser probe complete with software to verify tool breakage
and for tool length and tool radius measuring
Laser probe complete with software for tool length and radius measuring and tool breakage control.
Measurement is through automatic cycle and data are sent directly to CNC.
The probe is installed in a fixed position within the working area.
During the machining operation the optics are mechanically sealed against chips and coolant by a mechanical
shutter in front of the optics.
Before measurement, dirt and chips are removed through air blast.
Rotating-sliding table TRT
TRT15-PT2020 Hydrostatic rototraversing table
Table Sliding Unit
– Bed is in electro-welded, elaborated by computer and especially dimensioned and ribbed to obtain maximum
rigidity. Table saddle is in stabilized Meehanite cast iron.
– Grounded prismatic guideways, with counter-guideways covered with anti-friction specially dimensioned to
obtain maximum stability, responsiveness and lower stick-slip of the table-group movement.
– Longitudinal movement is obtained through high-precision, ground balls-screw on pre-loaded double nuts,
driven by AC motor.
– Telescopic cover for the guideways made of steel and for all kinematic movements expressly designed to avoid
any introduction of chips and coolant.
– Levelling units with micrometric adjustment
Table Group
– Table is in Meehanite GB/GC 300, stress relieved after the rough cutting.
– The table is placed on a thrust-bearing provided with pockets made from the antifriction material in which is
injected oil under pressure. This guarantees an efficient HYDROSTATIC support, a smooth movement and a
total absence of stick-slip effect also when max. loads are applied. In the middle of the table there is an axial
roller bearing, which gives the pre-loading to the HYDROSTATIC thrust-bearing, and a radial bearing double
Page 13 / 23- Offer 354-19/3 – 476//AS –
DIP INTERNATIONAL SRL
roller line. This configuration provided maximum rigidity of the system a great loading capacity and an extreme
smoothness.
– Table rotation system is obtained through double pinion and rack for automatic back lash compensation.
– Gear box in oil-bath driven by AC motor.
– Table locking (clamping) system, with automatic back lash
– Position measuring of table axis by incremental encoder HEIDENHAIN.
– High precision transmission parts purposely dimensioned to resist high torque (twisting) moments.
Load capacity (centered and evenly distributed) kg (lb) 15.000 (33069)
Faceplate dimension mm (in) 2000×2000
(78.74×78.74)
Working torque available rotary axis table Nm (lbfft) 20000 (14751)
Tilting moment Nm (lbfft) 50000 (36878)
Max. table revolutions r.p.m. 3,7
Dividing accuracy °
(arcsec) 0.0005 (1.8)
T slot width mm (in) 22 (0.8661) DIN650
Distance between T slots mm (in) 185 (7.283)
Center hole mm (in) 100 H6 (3.937)
Rapid axis speed mm/min
(ipm) 12000 (472.44)
Stroke mm (in) 1500 (59.06)
RTCP-TR Static RTCP for rotating tables
This software enables the programming of machining in any direction allowed by the head as to the rotating table
without movements of the origins. It is useful for machining with inclined ball nose tools even with continuous
movement both of the head and of the rotating table in any direction. The option is required for any single table.
In case of rotating-translating table, the option is effected on a predetermined position.
Note:
In order to keep the accuracy achievable with this option, the machine must be kept in the condition of absolute
thermal stability (21°C + 0.5°C), without exposure to any heat source and/or air-stream.
In case of intervention or geometrical controls after the installation of the table, this option must be required one
more time.
ATC40_BT50_OV_20 Chain-system Automatic Tool Changer
Chain-system Automatic Tool Changer assembled on the left side of the column with special covers for operator
safety. It is provided with special arm for tool changing in vertical and horizontal position and with preselection of
the next tool. Fixed pocket tool change management.
Tools n° 40
Max. tool diameter mm (in) 125 (4.92)
Max. tool diameter with free adjacent tool pocket mm (in) 230 (9.06)
Max. tool length mm (in) 400 (15.75)
Max tool weight kg (lb) 20 (44)
Tools type type BT50
Page 14 / 23- Offer 354-19/3 – 476//AS –
DIP INTERNATIONAL SRL
LEIU_15 Coolant outside/inside the tool (LEU/LEIU)
Feeding system of the coolant outside/inside the tool.
The system includes:
– a tank for collecting the tool coolant;
– a pump enabling the tool coolant to be collected from the machine and be poured into the collecting tank;
– a pump for feeding of the inside line and the outside line of coolant alternatively; fixed setting of the two lines
through manometers and dedicated reducing valves;
– coolant’s flow rate can be adjusted through operator panel by relevant soft-key;
– a filter positioned on the flow line of the coolant pump, filter A;
– a paper filter positioned on the line of the coolant poured from the machine up to the tank, filter B.
Tank capacity l 1200
Degree of filtration with filter type A micron 60
Degree of filtration with filter type B micron 40
Max. flow rate LEU function l/min
(gpm) 30 (7.92)
Max pressure LEU function bar (psi) 10 (145)
Max. flow rate LEIU function l/min
(gpm) 30 (7.92)
Max pressure LEIU function bar (psi) 40 (580)
VM_ETD60 Chip conveyor with exit on the right
EXTRACAL EXTRACAL System
Automatic measuring device, installed on the machine, for certifying the accuracy of the machine and of the
machining performed on the workpieces.
EXTRACAL is composed by a complex system of active/passive laser emitters, called OLS (Optics Laser
Station).
OLS are installed both on the floor (absolute datum station) and on the machine.
Signals, coming from OLS, are processed by a dedicated software, which is developed by FPT in order to return
to Customer/Operator a clear image of the machine state in terms of geometry accuracy of axes.
The software can then manage possible interventions for adjusting machine geometries, employing
compensation mechatronic systems, already installed on the machine, and/or proposing software
compensations.
EXTRACAL system can be used as measuring instrument, independent of the machine, to measure the accuracy
of the machining performed on the workpiece. To do this, EXTRACAL uses touch probe for workpiece measuring
(MAPR).
Page 15 / 23- Offer 354-19/3 – 476//AS –
DIP INTERNATIONAL SRL
TELESERVICE Teleservice
Remote assistance service via TeleService connection.
The Seller supplies a communication and remote assistance software which allows, via the Internet, the
possibility of connecting to the machine of the End User by Seller’s engineers.
The connection is unidirectional and is protected by a password of the End User.
The provided software allows to support the End User in simple and rapid diagnosis of the machine and also
allows the remote management and monitoring of the NC.
The service engineers can also quickly and easily search the errors within drives / motors and, thanks to the
dynamic display of status signals, it is also possible to analyse the causes that have created the error. The
activation of the TeleService line ensures readiness for action, effectiveness of service and minimizes downtime.
To use TeleService, the End User must provide a PC with internet access in order to connect to the NC of the
machine.
The duration of the service is equal to the warranty period of the machine and can be extended every year.
The premise for any condition and technical service is that, upon the request of the Seller, TeleService is
immediately available, plugged in and operating. Should this not be, any activity will be provided according to the
availability and scheduling of the Seller, and any kind of technical performance, even during the warranty period,
will be invoiced.
M3D1_STEP 3D mathematical model of the machine, simplified in STEP
format, for CAD use
2 x SQ251012 2 x Cast-iron angle plate designed by FPT
Height mm (in) 2500 (98.42)
Width mm (in) 1000 (39.37)
Depth mm (in) 1200 (47.24)
T slot width mm (in) 22 H11 (0.866)
Distance between T slots mm (in) 250 (9.84)
IZL Lighting of the working area
PC_0354_19-02 GENERIC TOOL LIST 10 SPINDLES ISO 50
VM_AAL60 Levelling unit kit for longitudinal axis mm 6000
VS-FPT FPT standard colours
RAL 7015 (slate grey) – RAL 7035 (light grey) – RAL 1003 (signal yellow)
Page 17 / 23- Offer 354-19/3 – 476//AS –
DIP INTERNATIONAL SRL
ART001 Fast Mill material
2 x third point + 4 modules.
MAN_CNC_PRINT Documentation, use and maintenance manual and CNC
manuals in paper
FPT Use and maintenance manual supplied in one (1) printed copy.
Manuals provided by FPT suppliers (such as tool changers, chip conveyors, electrospindle, probes etc.) supplied
only on CD-ROM.
Standard language of the documentation: English.
Documentation supplied in Customer’s language: only if available.
CNC manuals supplied in one (1) printed copy in the required language, only if available. Otherwise manuals will
be supplied in English, or other language, if available, to be defined at the order.
MAN_RO Documentation and use/maintenance manual in Romanian
language
FPT manuals are supplied on DVD-ROM.
All manuals by FPT sub-suppliers (tool magazines, chip conveyors, high frequency spindles, probes, etc.) are
supplied on CD/DVD-ROM and in Romanian only if available. Standard language for manuals by FPT subsuppliers and for layouts and schemes (electric, hydraulic, pneumatic, etc.) is English.


